If you have ever seen plants sculpted into different shapes, you might wonder how gardeners do it. This is called topiary, or the practice of pruning and clipping plants into clearly defined shapes. The practice dates back to Roman times but is still a popular style today. Traditionally, topiary is done with evergreen plants, but with a topiary frame, you can create the same look with your ivy at home, either in your garden or even in a flowerpot.
You can add some artwork to your garden with topiary frames. Topiary artforms add a little bit of style to your plants and can be the living centerpiece of any garden. Creating these living sculptures may seem difficult, but with these step-by-step instructions, adding foliage to a topiary frame could not be easier. Soon your garden will be the perfect place to read a book or host a party with the lovely ivy topiary artwork.
This is also a good way to add interesting landscaping to your business. Create your logo with plants using a topiary frame or add a point of interest outside your store or office to draw attention. It’s a pleasant and eco-friendly way to draw attention to your business and create a welcoming atmosphere.
Step 1:
Cover ivy plant with a topiary frame. The first thing you want to do is insert the top of your ivy plant through the opening at the base of the frame, so it is inside the frame. Start with the top of the ivy. Do not worry about the bottom ivy and leaves yet. Pull the ivy in gently and carefully so you do not damage the plant. Pull the ivy up the topiary frame as much as it will go.
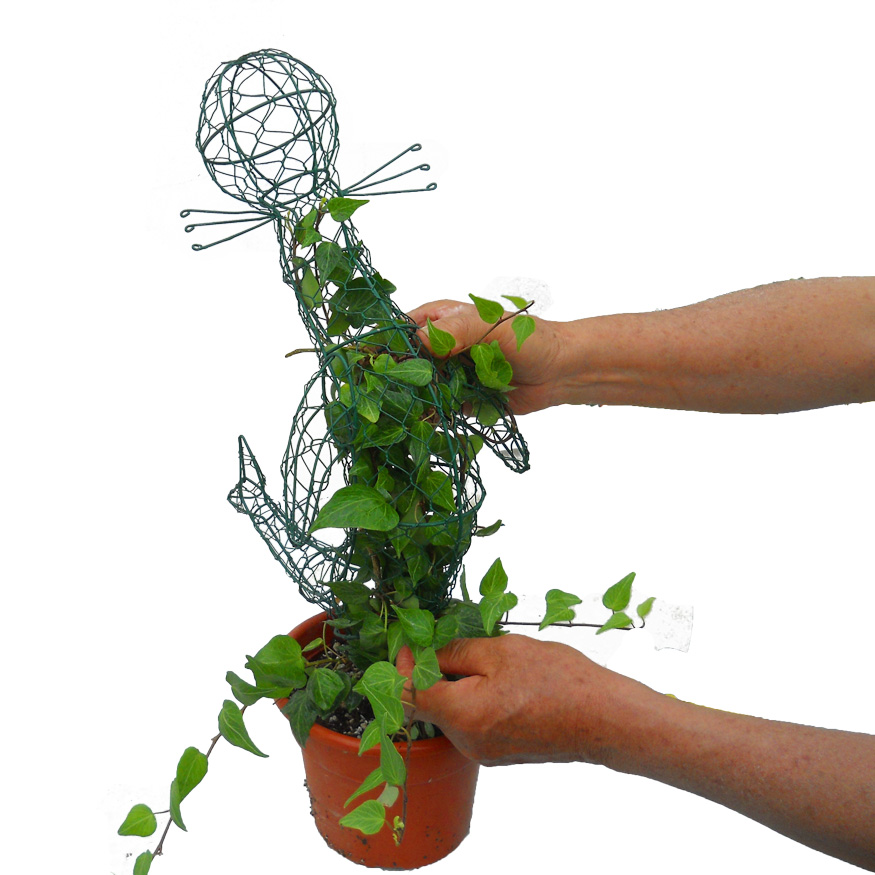
Step 2:
Insert the leaves into the frame around the base and the frame will begin to stand upright.
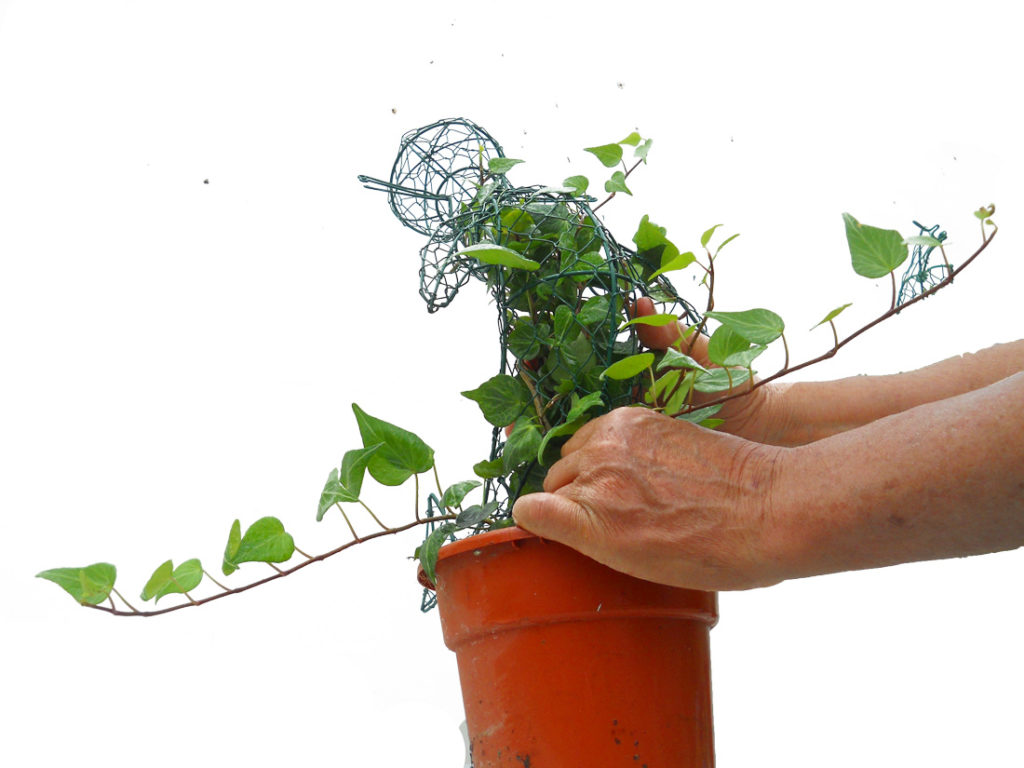
Now that the top part is inside, start tucking the bottom leaves of the plant into the bottom of the topiary frame until all the bottom leaves are inside. The frame should completely cover the base of the plant when you are done. Once all the bottom leaves are in the topiary frame, it should be able to stand on its own without propping it up. Now the artwork is slowly coming together and you can almost see the end result.
Step 3:
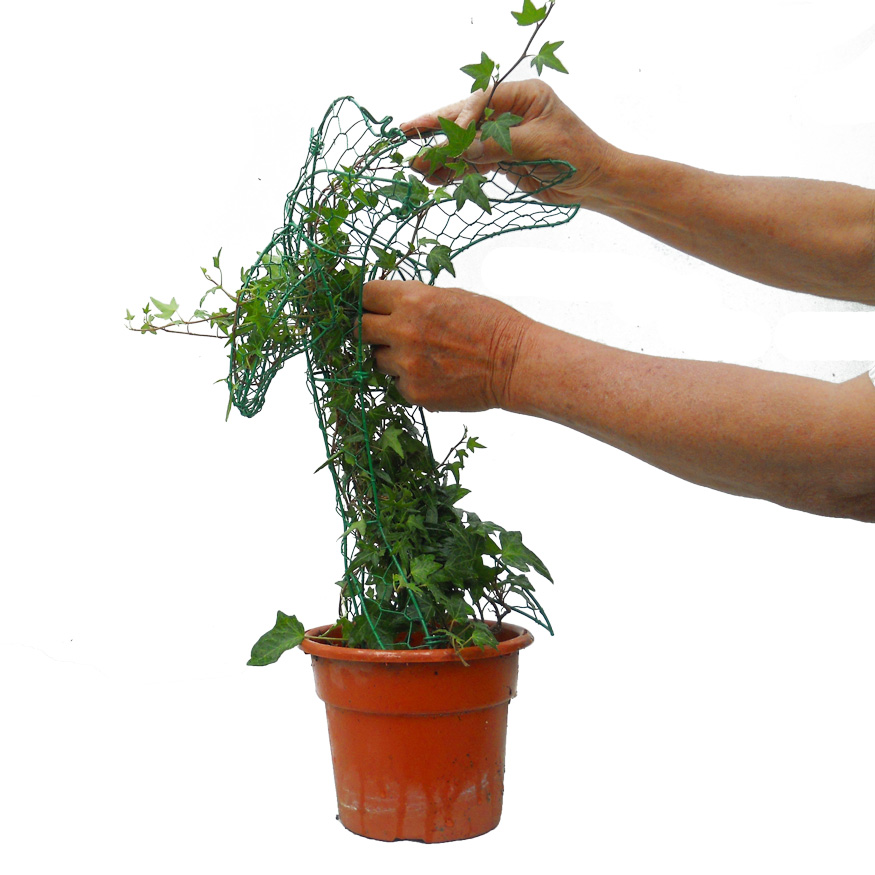
Once leaves are inserted, the topiary frame can be opened to continue pushing leaves inside.
Now that the topiary frame can stand on its own, you can open up the top of the frame. Open the top of the topiary frame and pull the top leaves into the frame. Use your fingers to pull the leaves inside, one by one. Be careful not to damage the leaves or the stems. The end goal is to eventually have all the leaves in the frame to make a smooth living sculpture.

Step 4:
Move your way up the topiary frame continuing to leaves inside the frame.
Continue moving the ivy up the frame until all the leaves and ivy are inside and arranged to the shape of the frame. Tease the plant into the different sections of the frame if you have a more complex topiary frame. If there is still room at the top, that is okay because the ivy will continue to grow over time. You may have to continue arranging it over time to grow in the shape that you want but luckily the frame will serve as a permanent trimming guide, so maintaining its shape will be easy and take minimal effort now that the frame is in place.
Once all the ivy and leaves are in place, close up the frame, place it in your preferred spot where the plant grows best, and enjoy your new living artwork. Now you have the perfect centerpiece for your garden or a nice atmospheric and eco-friendly touch for your business.
Incoming search terms:
- https://topiarytree net/blog/2020/03/28/how-to-add-ivy-foilage-to-a-topiary-frame/
- can i shape my ivy plant